Windows系统下进行ssh免密远程登录Windows SSH服务端
# 服务端配置
下载最新版本 (opens new window)OpenSSH包,本地下载 (opens new window)(Win64版本v8.1.0.0p1-Beta)
将最新版本的内容提取到
"C:\Program Files\OpenSSH"(确保二进制位置仅对SYSTEM,管理员组具有写权限。经过身份验证的用户应该并且仅具有读取和执行。)进入
"C:\Program Files\OpenSSH"然后管理员模式运行Powershell,运行以下命令
powershell.exe -ExecutionPolicy Bypass -File install-sshd.ps1
- 打开sshd.exe的防火墙,以允许入站SSH连接
New-NetFirewallRule -Name sshd -DisplayName 'OpenSSH Server (sshd)' -Enabled True -Direction Inbound -Protocol TCP -Action Allow -LocalPort 22
注意
New-NetFirewallRule 仅适用于Windows 2012及更高版本的服务器。如果您使用的是客户端台式机(例如Windows 10)或Windows 2008 R2及更低版本,请尝试:
netsh advfirewall firewall add rule name=sshd dir=in action=allow protocol=TCP localport=22
- 开始 sshd 服务
net start sshd

Set-Service sshd -StartupType Automatic
2
3
# 客户端配置
首先检查是否安装了SSH客户端,打开
Windows PowerShell,运行ssh查看是否有反馈 (Windows 10 1803后自带ssh客户端,如果没有,可参考安装步骤)需要为客户端生成一些公钥/私钥对,使用 ssh-keygen 生成一些密钥文件
cd ~\.ssh\
ssh-keygen
2
你可以按 Enter 来接受默认值,或指定要在其中生成密钥的路径 (其中,"username"将替代为你的用户名,"id_ed25519"是代替公钥,"id_ed25519.pub"是代替私钥)
Enter passphrase (empty for no passphrase):
Enter same passphrase again:
Your identification has been saved in C:\Users\username\.ssh\id_ed25519.
Your public key has been saved in C:\Users\username\.ssh\id_ed25519.pub.
The key fingerprint is:
SHA256:OIzc1yE7joL2Bzy8!gS0j8eGK7bYaH1FmF3sDuMeSj8 username@server@LOCAL-HOSTNAME
2
3
4
5
6
- 请以管理员身份启动
ssh-agent服务并使用ssh-add来存储私钥
# Make sure you're running as an Administrator
Start-Service ssh-agent

# This should return a status of Running
Get-Service ssh-agent

# Now load your key files into ssh-agent
ssh-add ~\.ssh\id_ed25519
2
3
4
5
6
7
8
# 部署公钥
# -(如果用普通用户 连接服务端)
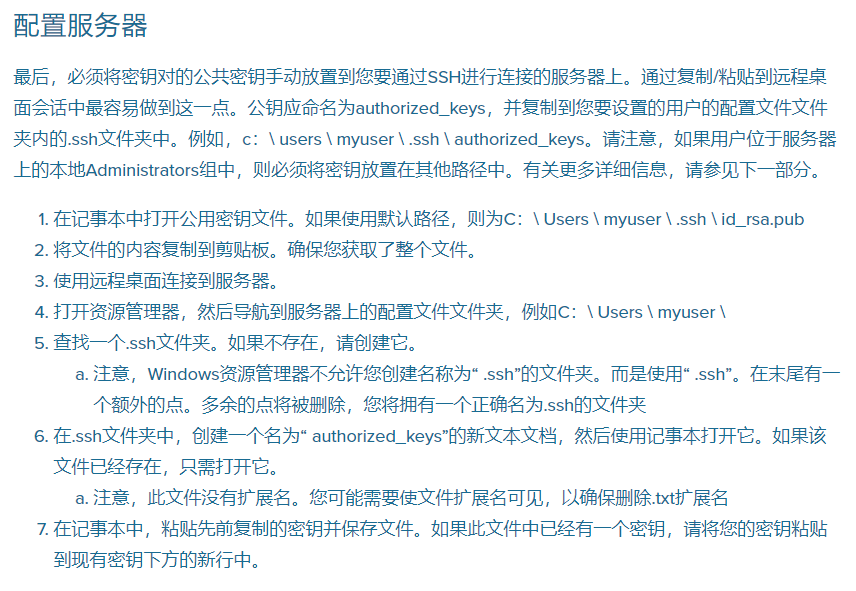
将客户端的公钥 (~.ssh\id_ed25519.pub) 的内容移动到服务端上~\.ssh中名为authorized_keys(无扩展名) 的文本文件中。
在客户端上启动Windows PowerShell,运行以下命令
# Make sure that the .ssh directory exists in your server's home folder
ssh user1@domain1@contoso.com mkdir C:\users\user1\.ssh\

# Use scp to copy the public key file generated previously to authorized_keys on your server
scp C:\Users\username\.ssh\id_ed25519.pub user1@domain1@contoso.com:C:\Users\user1\.ssh\authorized_keys

# Appropriately ACL the authorized_keys file on your server
ssh --% user1@domain1@contoso.com powershell -c $ConfirmPreference = 'None'; Repair-AuthorizedKeyPermission C:\Users\user1\.ssh\authorized_keys
2
3
4
5
6
7
8
# 服务端其他操作方法
# -(如果用管理用户 连接服务端)
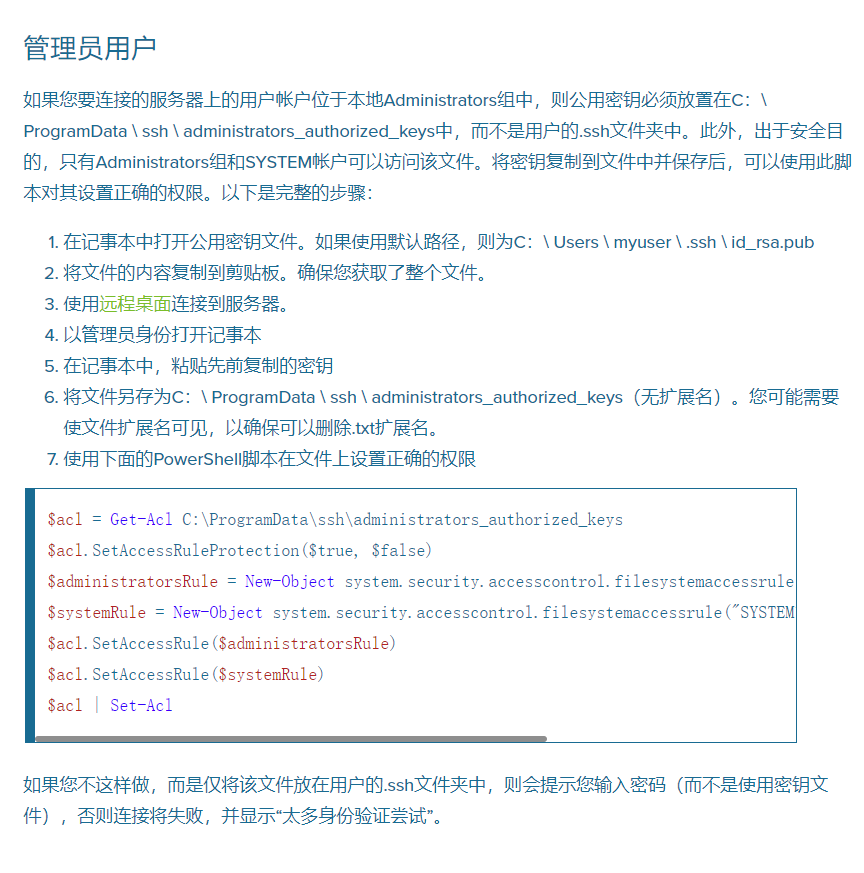
将客户端的公钥 (~.ssh\id_ed25519.pub) 的内容移动到服务端上C:\ProgramData\ssh\中名为administrators_authorized_keys (无扩展名)的文本文件中。
在服务端上启动Windows PowerShell,运行以下命令
$acl = Get-Acl C:\ProgramData\ssh\administrators_authorized_keys
$acl.SetAccessRuleProtection($true, $false)
$administratorsRule = New-Object system.security.accesscontrol.filesystemaccessrule("Administrators","FullControl","Allow")
$systemRule = New-Object system.security.accesscontrol.filesystemaccessrule("SYSTEM","FullControl","Allow")
$acl.SetAccessRule($administratorsRule)
$acl.SetAccessRule($systemRule)
$acl | Set-Acl
2
3
4
5
6
7
# 服务端其他操作方法